THE 1x1 RIB CAST-ON
The 1x1 rib cast-on is perfect for 1x1 rib stitch knittings. The edges will be more elastic and stretchy than with a basic cast-on. It might seem a little complicated at first as they are many steps in the tutorial, but with a little practice, it's actually quite easy.
How to do a 1x1 rib cast-on
1. Start by making a slip knot
If you need more details on how to do a slip knot, go to "How to make a slip knot"
2. Attach the slip knot to one of the knitting needles
Slide a needle into the knot and pull on the tail yarn to tighten the knot (1).
3. Cast-on a knit stitch
- Hold the needle in your right hand, with the working yarn (leading to the ball) to your right and the tail yarn in the left hand. (2)
- Hold the slip knot with you index and wrap the tail yarn around the needle, clockwise, passing under then over the needle (3-4)
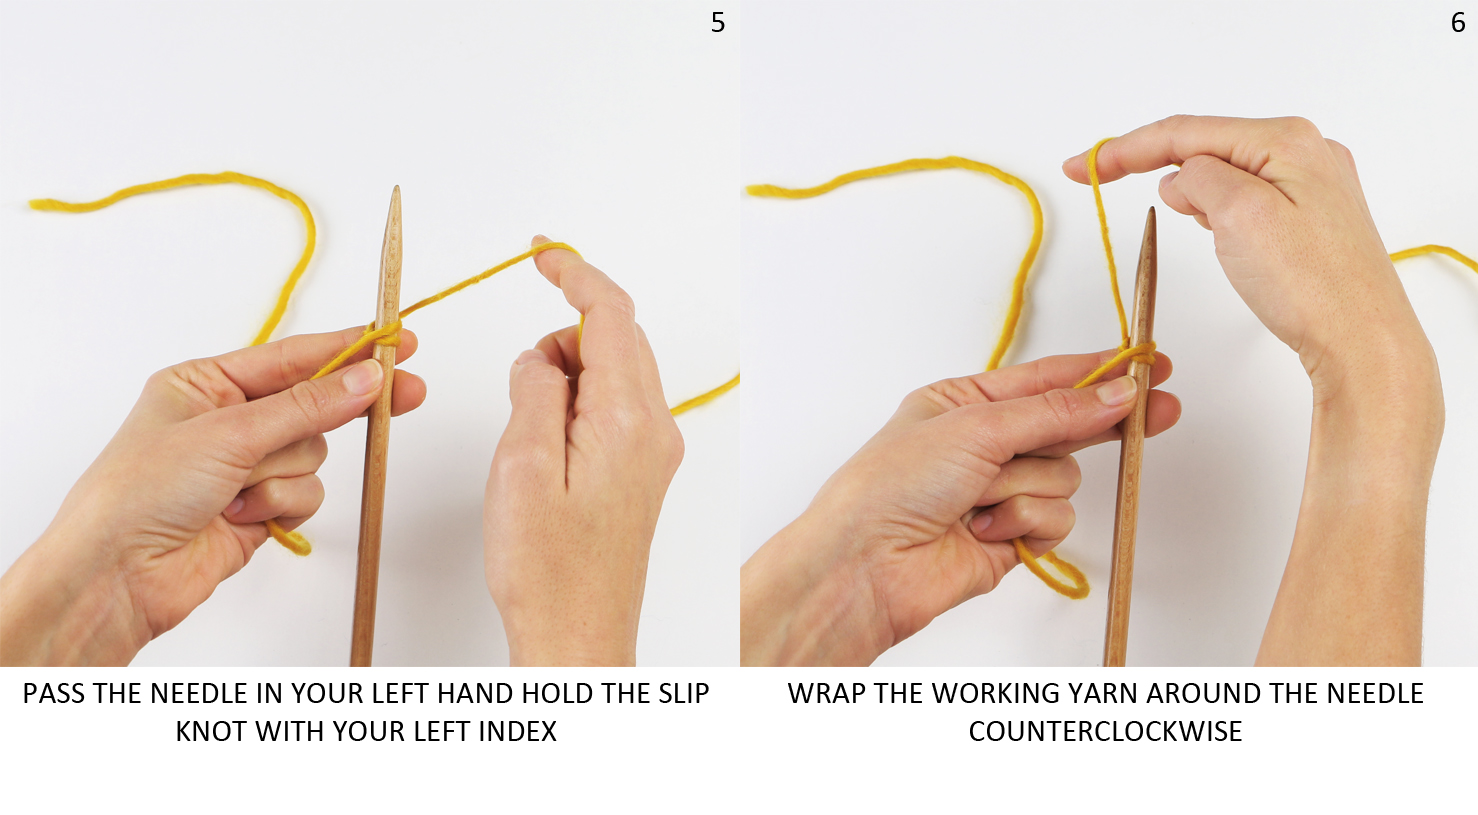
- Pass the needle in your left hand, hold the slip knot with your left index (5) and wrap the working yarn around the needle, counterclockwise, passing under then over the needle (6-7)
- Pass the needle in your right hand, holding the slip knot with the right index (8) and pass the tail yarn over then under the needle, counterclockwise (9). The tail yarn passes over the working yarn to form the first knit stitch (10)
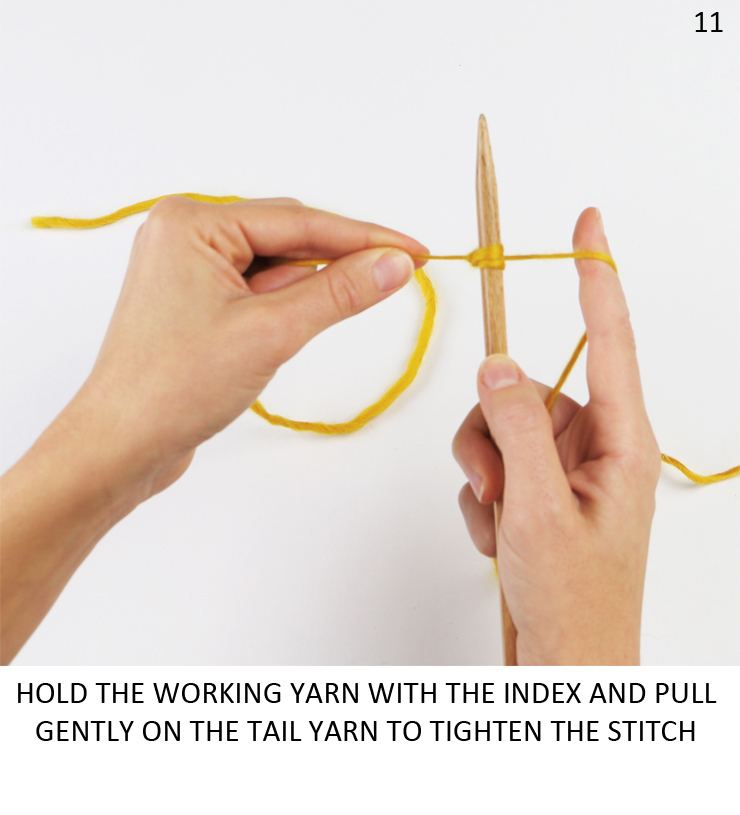
- Hold the working yarn with the index and pull gently on the tail yarn to tighten the stitch (11)


4. Cast-on a purl stitch
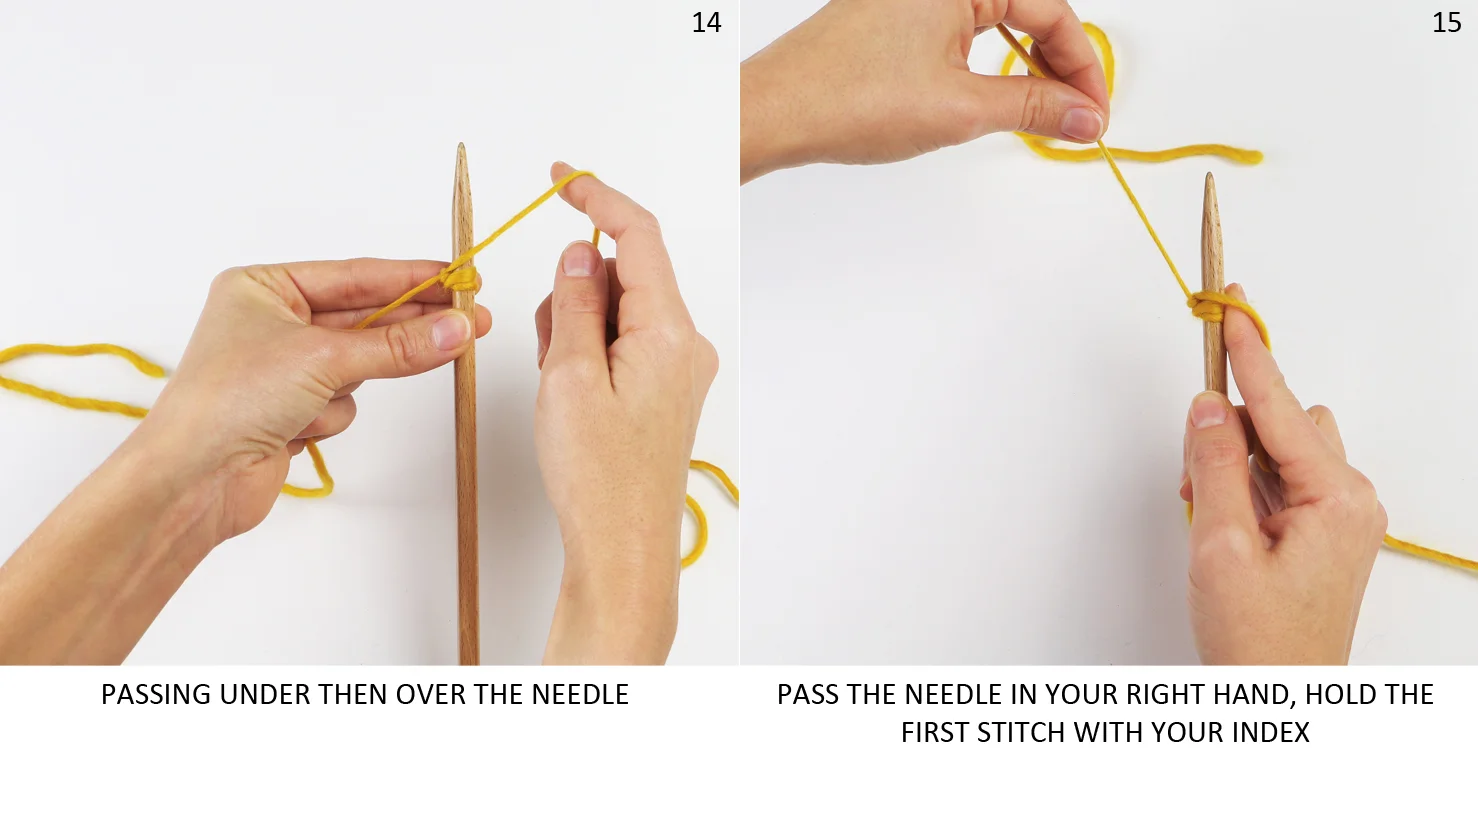
- Place the needle in your left hand, hold the first stitch with your index (12) and wrap the working yarn around the needle, counterclockwise, passing under then over the needle (13-14)
- Pass the needle in your right hand, hold the first stitch with your index (15) and wrap the tail yarn around the needle, clockwise, passing over then under the needle (16-17)
- Pass the needle in your left hand, hold the first stitch with your index (18) and pass the working yarn over then under the needle, clockwise (19). The working yarn passes over the tail yarn to form a purl stitch (20)
- Pull gently on the tail yarn to tighten the stitch (21)


5. Keep casting-on a knit stitch followed by a purl stitch, repeating steps 2 to 21, until you get the number of stitches needed. The last stitch should be a knit stitch (22)

6. The foundation row
- Hold the needle with the cast-on in your left hand and the other needle in your right hand (23)
- Knit the first stitch (24-25)
- Knit the second stitch making sure you knit the back strand (26-27)
- Pass the yarn in front (28)
- Slip the next stitch, without knitting it (29-30)
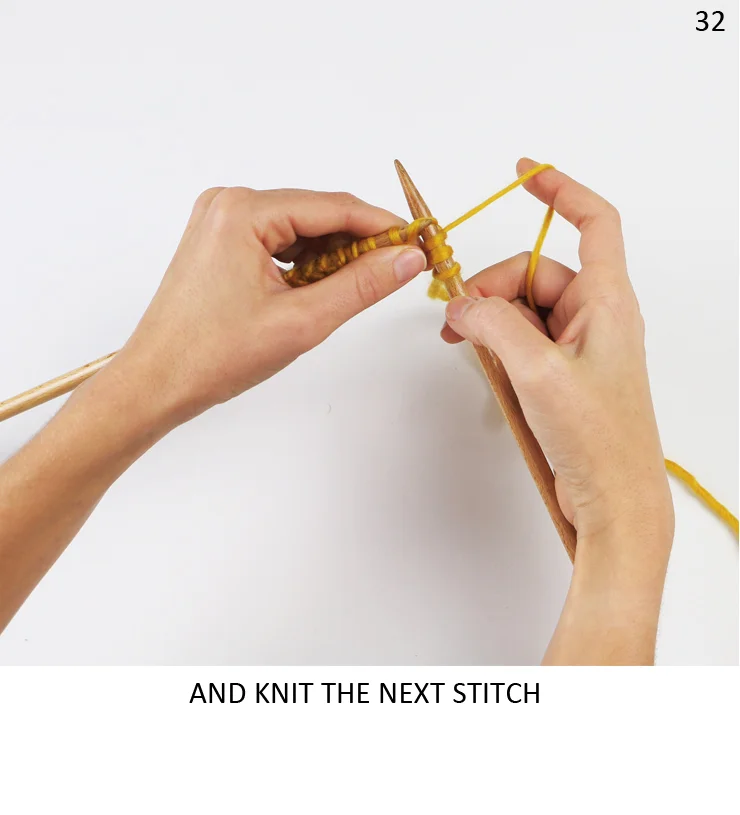
- Pass the yarn in the back (31) and knit the next stitch (32)
- Keep going, slipping one stitch with yarn in front and knitting the next one (steps 24 to 31) till the end of the row.


Your 1x1 rib cast-on is ready!